Tag: recipes (page 4 of 5)

Sweet Paul

I always enjoy perusing Sweet Paul’s blog. There are a multitude of beautiful images to look at and the simplistic style of his blog gives it a classic distinction.

I don’t just visit his site to gaze at the alluring and interestingly taken photos, I also go there to read his magazine. The best part is, you can read it online, if you so chose, without having to purchase a physical copy.

His latest issue is a children’s edition, packed full of the wonderful sweet things I have come to love and expect from him and his team.

This apple green horse alone, makes me want to eat this pie, if only to have the chance to stare at him while I munch away.

While flipping through the current issue I came across these and maybe it was because I was craving something sweet at the time and they were decorated in brightly coloured sprinkles, or maybe it is because I find this photograph simplistically charming, but I thought I would share it with you: Chocolate Sprinkle Ice Cream Bites. Nothing fancy, but mouth-wateringly presented and the essence of the perfect bite!

(All images are copyright Sweet Paul Blog, first image was embellished by J. Michie)

When you have Lemons…

If life gives you lemons, make lemonade as the embroidery sampler in my Mom’s kitchen says! This has been a week, where I just haven’t stopped and I am not going to get the chance to either! I have had a lot of lemons this week and I am making as much lemonade as I can! I might need to set up a stall outside of my house to sell it all.

I have guest coming this weekend, a house that needs to be cleaned, a brunch to prepare for tomorrow and I need to get myself in the mood to entertain. Which normally is not my usual take on things. My parent’s are fabulous entertainers, they have created a home where you always feel “Welcome”, and they have given that gift to myself and my sister. But, this week has been so hectic and next will be as well with Art exams that I am not really in the mood for company. But, I know I will enjoy it when it is all happening.

I was flipping through my cookbooks, trying to find the perfect Spring time dessert for tomorrow and when nothing jumped out at me, I turned to a tried and trusted source: The Pioneer Woman’s Tasty Kitchen Blog. And, it was here that I immediately spotted what I wanted to make. A scrumptious Buttermilk Blueberry & Lemon Cake that looks like it holds the essence of Spring inside it. So, after everything else is done, this is going into the oven tonight, because I have a bowl full of lemons and you know what they say….

A Pot of Pie

I spied these lovely pumpkin pies in a jar over at Inchmark and I think they are a beautiful idea, for a little something different!

They would look charming displayed on a table set upon Johnson Bros. “Friendly Village Autumn” luncheon plates. I also think they would be the perfect breakfast, because, you have to keep your energy up as you slave away over that succulent roasted bird and stuffing!

All I need is a spoon and a little extra whipped cream…

(All images copyright Inchmark)

Orange You Glad?

Orange you glad that as it gets darker sooner outside, it gets cozier sooner inside? I am! My candles are lit as soon as I get home from work and my cozy lamps make the rooms feel cheerier in this Fall season. We are not long away from twinkle lights and late nights up talking over a cup of hot chocolate for me and a cup of hot tea for Mr. Michie.

When the seasons turn to evening coming quicker and the air gets frosty, I love to have breakfast for  dinner. We do it so many ways; we will have Southern breakfast with biscuits and grits, or maybe French style, a Croque-Monsieur with a fried egg on top and a dressed salad, or a fluffy cheesy omelet with toast or simply a nice stack of pancakes, dripping with syrup.

After receiving my last “Willard” from the lovely Susan Branch, I went to check out her new homepage and in reading, discovered the following recipe, I think it will be going into our “breakfast for dinner” stash of ideas. I can’t wait to try it!

(Image copyright Susan Branch click on the image to go to a larger version)

A Kiss Goodbye

Today, as September comes to a close the last little taste of Summer is clinging to it. Even though the sun shone bright this morning, through the mist on the common, it was still so cold. Our breath hung in little icy moisture droplets above us as we waited for our cherry red bus to come.

I love Summer and all it holds, but I love this time, when seasons change from one into the other and as the curtains draw on the final little bit of Summer and we kiss it goodbye, I welcome, with arms open-wide, all the best that Fall has to offer us. And one such thing is a bounty of gorgeous apples. I grew up on a farm and one of our staple crops were apples. There was nothing better than when my Dad, came home with the first of the year’s apple cider in frosty jugs for us to gobble down.

Apples in season, meant ever-ready bushels of sweetness awaiting us. Thin sliced apples with crackers and hoop cheese, fresh frosty cider, my Dad’s applesauce for breakfast and my Mom’s apple butter spread over hot biscuits. Fall holds a sweetness to it all of its own, a beauty of color and taste.

As we truly kiss the last of Summer goodbye and welcome in Fall, I found a recipe that I thought I would share with you, I have had cookies similar to this growing up and this was just something to delicious not to share!

Iced Apple Cookies
  • 2 cup(s) all-purpose flour
  • 1 teaspoon(s) baking soda
  • 1 teaspoon(s) cinnamon
  • 1/2 teaspoon(s) salt
  • 1/4 teaspoon(s) cloves
  • 1/4 teaspoon(s) nutmeg
  • 1 1/3 cup(s) (packed) light brown sugar
  • 3/4 cup(s) unsalted butter, softened
  • 2 tablespoon(s) unsalted butter, softened
  • 1 large egg
  • 1 cup(s) pecans, chopped
  • 1 cup(s) raisins
  • 1 cup(s) chopped Red Delicious apple
  • 1/2 cup(s) apple cider
  • 2 tablespoon(s) apple cider
  • 3 cup(s) confectioners’ sugar

Directions
  1. Make the batter: Preheat oven to 350 degrees F. Combine the flour, baking soda, cinnamon, salt, cloves, and nutmeg in a medium bowl. Cream the sugar and 3/4 cup butter in a large bowl until light and fluffy. Add the egg and beat until incorporated. Gradually add the flour mixture and beat until combined. Stir in the pecans, raisins, apples, and 1/4 cup apple cider.
  2. Bake the cookies: Drop by heaping tablespoon, 2 inches apart, onto parchment-lined baking sheets. Flatten each mound slightly and bake 18 to 22 minutes. Cool on a wire rack.
  3. In a small bowl, stir together the sugar, remaining cider, and butter until smooth. Drizzle about 1 tablespoon of icing over each cookie. Store in an airtight container for up to 4 days.

(Recipe & Image copyright Country Living)

Ice-Cream Sandwiches

Yesterday, it was particularly sunny and hot here in our little London Burb and homemade ice-cream sandwiches were definitely in order!

To begin with, you will need ice-cream (flavour of your choice), cookies (something softer is a bit better than a crunchy cookie, but it is up to you), sprinkles or nuts (if desired, to roll the edges in, we decided to be purist yesterday), a spatula or knife, waxed or parchment paper and the most important ingredient: someone to share them with.

Gather your ingredients around you and let your ice-cream be slightly softened, it will be easier to spread. I normally keep homemade cookie dough in the freezer, but I had run out, so cheated and bought cookies from my local bakery.

Lay your cookies down in front on you, bottoms up and spread ice-cream over one cookie, use as much or as little ice-cream as you want, alternatively you can use an ice cream scoop and place one scoop in the middle and then mash down with the top of your other cookie. Place the other cookie on top and press them together.

Fold them up in wax paper or parchment paper, creating a little parcel of happiness and place them in your freezer, they need to sit in here for at least 30 minutes for the ice-cream to harden. You can leave them in longer. These were made in the morning and not enjoyed until the evening after we had eaten dinner.

When you are ready to eat them, pull them out of the freezer, folding your wax/parchment paper back so that you have a little opening in which to munch away at your ice-cream sandwich, but the bottom is still covered to keep your hands clean.

Make sure you have a nice sunny day (or a cloudy one if you need something to cheer you up), a front porch to sit on or a nice walk to go on and most importantly someone you love to share it with, because that will make it taste that much sweeter!

ENJOY!

When Life Gives You Lemons…

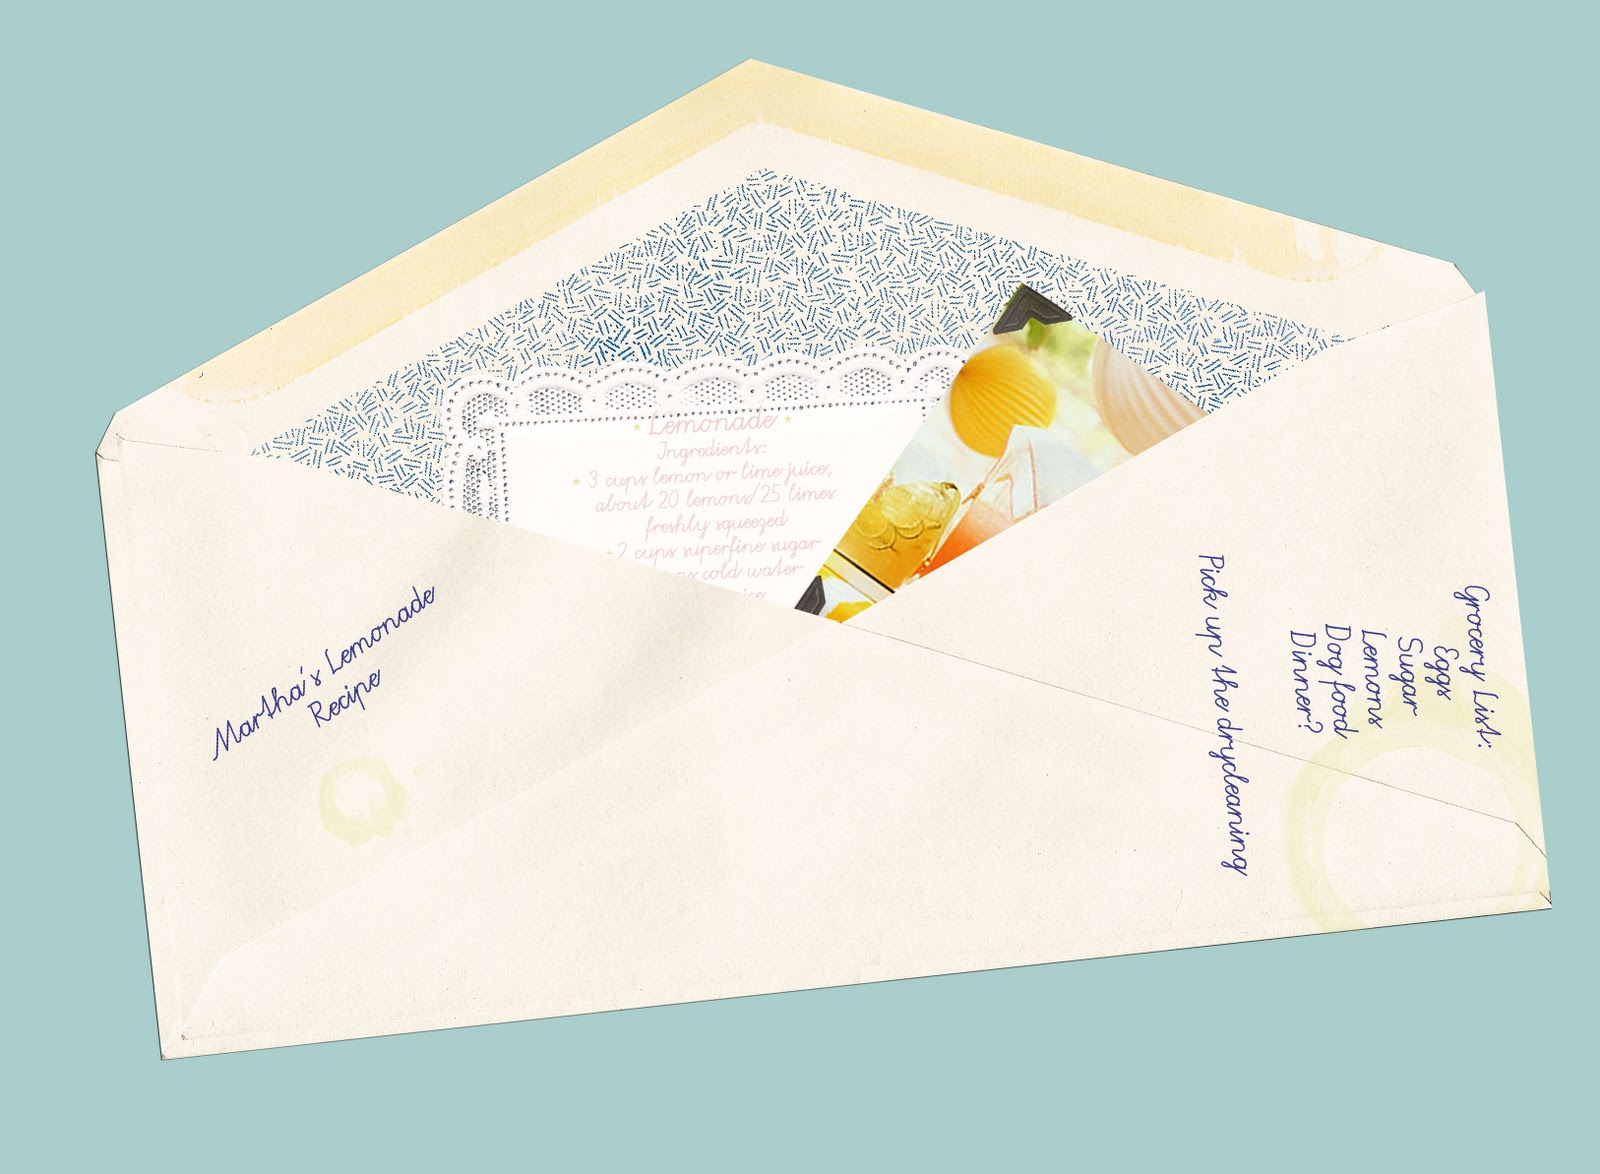
When life gives you lemons, MAKE LEMONADE! My Mama has a cross stitch sampler of this saying hanging in the kitchen and my sister and I just love it. This has been a bit of a lemon week, but thankfully it is coming to an end and the weekend brings with it something very special.

I love lemonade, it was always a sign of summer. We would be playing outside, riding our bikes everywhere (I had my Mom’s old bike, sparkly turqouise with a white banana seat, I loved it!) and you were always about to drop from thirst when you came in from the heat. But, if you could just make it a few more steps into the kitchen there was always a pitcher of fresh lemonade on the counter, be it yellow, pink or green and nothing is more refreshing than a glass of lemonade. Unless, of course it is a glass of sweet tea, or even better 1/2 a glass of sweet tea + 1/2 a glass of lemonade=HEAVEN!

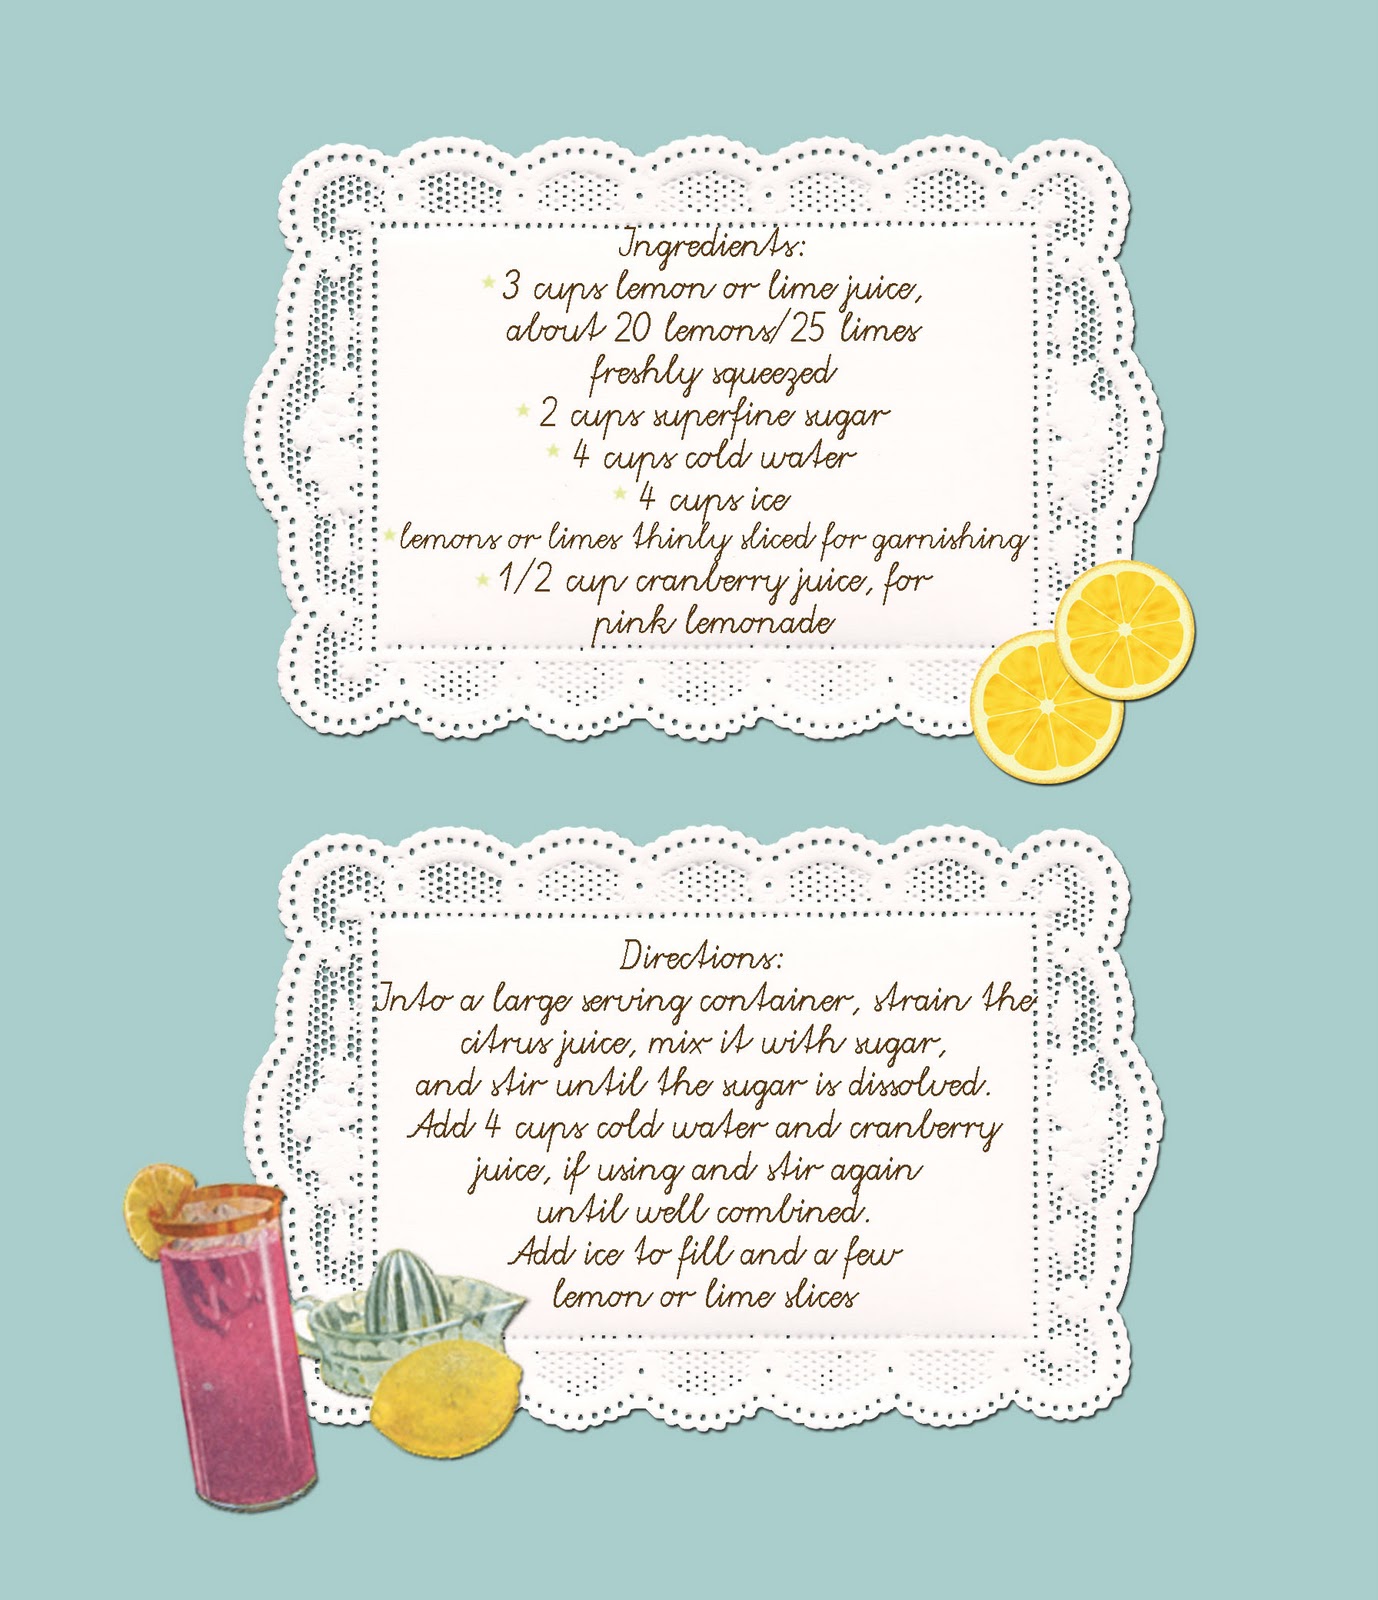
Since lemonade is not always the easiest thing to come by in England, or they way I like it to taste, I thought I would share a recipe with you courtesy of Martha Stewart. Enjoy! And, remember when life gives you lemons, MAKE LEMONADE!, this is sound advice!

(Recipe and lemonade image copyright Martha Stewart, Envelope and Doily graphics copyright the puglypixel, embellished by J. Michie)

*The Pugly Pixel is wonderful and she has the most delicious freebies, be sure to go to her site and take a peek!

Button Mushrooms

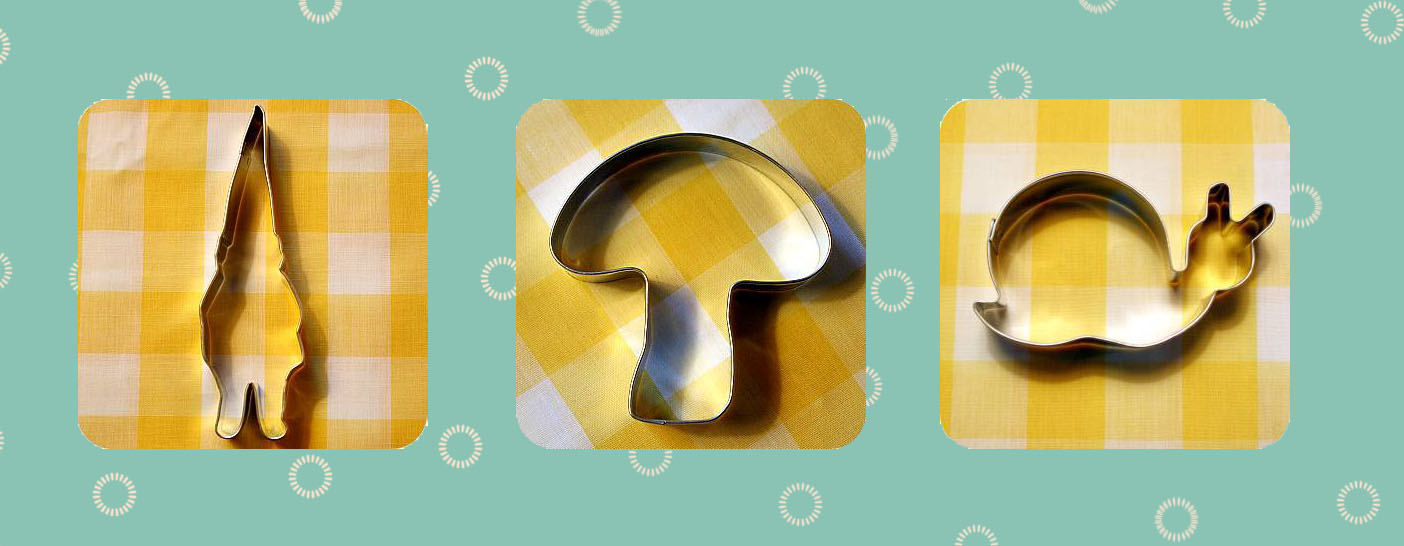
I found this adorable recipe on the Bake it Pretty Blog and I thought I would share. I love making shortbread, usually I just mould it into a pie shape and then cut it into thick wedges to have alongside a nice cup of tea. These would be perfect for a “Gnome Tea Party”, with Bake it Pretty’s gnome or mushroom sprig cake toppers placed on cupcakes and their gnome or snail shaped cookie cutters used for sugar cookies or to shape tea sandwiches. The possibilities are endless and I know I am already getting carried away with the ideas buzzing around in my head…

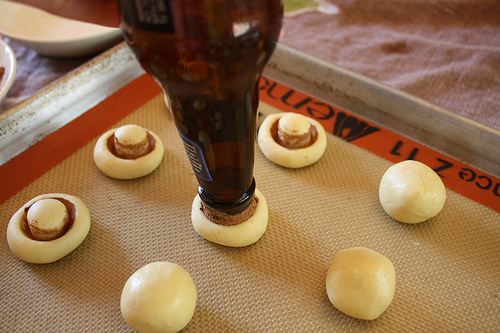
The use of a beer bottle dusted with cocoa powder is a fantastic idea to create that sweet squat mushroom stem. How inventive! Since I am in a shortbread baking kind of mood this weekend I thought about trying this recipe if we can squeeze it in to the crazy weekend that will be happening…

I have included their recipe if you want to try it for yourself:

Ingredients:

Preheat oven at 350 degrees  –  yields approx. 42 cookies
1 – 1/2 cups all purpose flour
1/2 cup cornstarch
1/2 cup powdered sugar
1 cup (two sticks) unsalted butter, softened
1 teaspoon vanilla extract
1/8 teaspoon table salt
One empty soda or beer bottle (cleaned and dried)
Cocoa powder (about 1/4 cup)
Water

Recipe:

Sift together flour, cornstarch, powdered sugar and salt.  Add softened butter and vanilla, and mix thoroughly until a thick but light dough is formed.  It should be soft but not too sticky, and easy to handle.

Roll the dough into 1″ balls and place about 1″ apart on baking sheets lined with parchment paper or silpat mats.  Place about 1/4 cup of cocoa powder into a small bowl, and about 1/4 cup water in to a separate small bowl.

Dip the top of the soda/beer bottle into water and shake off any excess.  Dip the bottle into the cocoa powder and tap the side to shake if any excess.  Gently press the bottle straight into one of your dough balls, pressing just barely into the dough, only about 1/4″ inch, then pull the bottle away.

Continue with the rest of your cookies, dipping your bottle into the cocoa between each pressing.  If it gets too light, do another water-dip then keep going.

Bake the cookies for 8-10 minutes in a 350 degree oven.  Take them out when they are just done, and barely the tiniest bit brown on the bottom.  Let cool on a wire rack for 30 minutes.

*Details:

– You can substitute flour for the cornstarch if you like, it will make the cookies a little more dense and toothsome.  I definitely reccomend using the cornstarch if possible, it really adds to the delicate and crumbly nature of the cookies.

(All images and recipe text copyright Bake it Pretty, cookie cutter image embellished by J. Michie)

1 Year Blogaversary

Today is my One Year Blogaversary! So put on your party hats! I can’t believe that a year has passed so quickly! I started this blog as a way to keep my creative juices flowing, to write about all the crazy things that flow in and out of my head and to work harder on my goals of getting my children’s books published and start my Etsy shop.

I never thought when I wrote my very first post that I would would meet so many wonderful people over the year and I want to thank all of you for reading and commenting, I never dreamed that I would have followers, readers and commentators, I thought only a few people would find me here and there, and that was ok, I created this Blog for me, and I have enjoyed every minute of it!

I wish we could all be together, I would have a party, a tea party of course since I live in jolly ole’ England. But, we might have to serve some iced sweet tea as well, I have not forgotten my Southern roots! If I was having a party I would serve this cake:

It just made me smile, and it looks perfect for a fun garden party. It also made me think of Burl Ives’ Lollipop Tree song, I had this record when I was little and my sister and I would dance around to this song. Oh if only there could be a real lollipop tree, I would quite enjoy that!

Keep reading, I have so much more to come, so much more to write and share, so much is happening at the moment, I am on the rollercoaster of life and not the merry-go-round and I am prepared to be surprised!

(vintage party children copyright The Baby Gardner)
* Obviously tea parties are floating around my head at the moment, since I wanted to have one on Monday as well…
**The actual Martha Stewart Lollipop Cake is a carrot cake with a cream cheese frosting, but I love the recipe for the Ruffle Tower Cake so I chose to use that one instead; you can find both on her site.
***Happy Cinco de Mayo

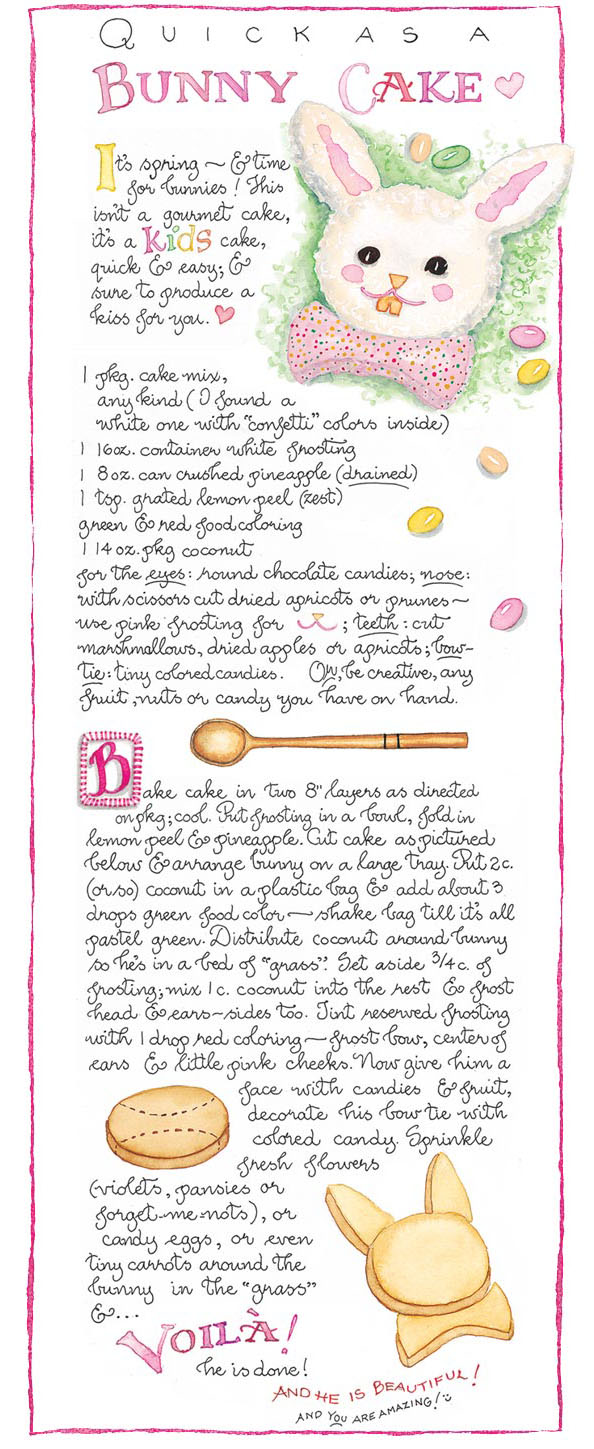
Quick as A Rabbit

I went to the gorgeous Susan Branch’s website today and saw this bunny cake on her homepage. He is too cute not to share! Wouldn’t he be fun to make for all the little people coming to your Easter party?

(Image copyright Susan Branch)