Tag: project (page 5 of 7)

St. Patrick’s Day Freebie

I come from a long line of inventive and artistic women. My Mom was always designing little things for us; drawing pictures on our lunch bags or on our love notes, especially if there was a holiday around the corner!

It is something that I have inherited from her. I love to doodle, to draw, to make things beautiful! I decorate for every holiday, just like she does! So, it was no surprise to me, as I was looking for my St. Patrick’s Day Leprechaun to put out that an idea popped into my head. I decided I would create a little something to put on my table.

I went through my collection of images, looking for one file in particular and when I spotted it, I knew just what I wanted to do with it. I would create place cards for my festively green St. Patty’s Day table.

I was so happy with how they turned out, I thought I would do something I’ve never done before: I would create a PDF file so that you can make them too!

I hope you enjoy making and using them as much as I have? If all goes well, a few more freebies might be springing up here and there.

To download your St. Patrick’s Day Freebie click here.

A Lucky Brooch

St. Patrick’s Day, is this Thursday and I can’t wait! There is still plenty of time to make something for your lapel, so you too, will be “Wearin’ O’ the Green”, as they say.

I spotted these cute shamrock pins on Martha Stewart’s website and I thought they were very sweet. They have an air of vintageness about them. Something you could have seen your grandmother wearing on the side of her hat, or pinned to her smartest coat. The perfect thing to bring you luck any time of year!

For the full directions and pattern, go here.

*Watch this space, I am giving away my FIRST ever FREEBIE this week and it may or may not be St. Patty’s Day related! ♧

Valentine’s Round-Up

Valentine’s Day is almost here and I have collected a few last minute ideas, recipes and sweetness from some of my favorite places to share with you. Click on the images below to be taken directly to the featured project:

Jenny B. Harris of Allsorts has done it again, with this cute Valentine’s Paper Angel. A fun project for your little ones to decorate your kitchen table with:

Serena of The Farm Chicks has created adorably wrapped chocolate brownie bites. A cute idea for the little Valentine Love Bugs in your life:

Eat, Drink, Chic has the most wonderful answer to staying in for Valentine’s. Amy Moss, has designed a DIY Valentine’s popcorn bucket to invite your Honey Bunny to spend a night snuggled next to you on the couch. You just have to provide the popcorn and the right movie:

The lovely Bridget, of Bake @ 350 has taken “bark” to a whole new level with her Sweet Heart Conversation Candy Bark. A great idea to hand out to your neighbours or any little Valentine’s fingers that might be around on the day:

The cute girls at One Charming Party have come up with simple yet effective idea. If you are stuck cooking on Valentine’s night, why not bring as many hearts into the mix as you can. These home made heart shaped pepperoni pieces add a cute flair to store bought pizza for your sweetie pie:

And, just in case you forgot to get a card head on over to Eat, Drink, Chic for some DIY printable Valentine’s cards and envelopes. You can never go wrong with polka dots!:

Have A Heart

I love these heart garlands that I found on “How About Orange“! They are a great way to use up fabric scraps, an easy sewing project for a beginner and a simple yet effective way to create something beautiful for your home.

A fabric stiffener is used to keep these hearts a fluttering. I looked in my local fabric store this weekend for a fabric stiffener, but they were out. I thought about trying starch but considering I live in a very damp little part of the world, I don’t think that is such a good idea.

Alas, I will just have to wait till they get more in stock. In the mean time I can dream of what fabric I will use and how pretty they will look strung along the mantle or on the bannister going up the stairs, or in my cottage window…

For the How-To go here.

More Clues

The week has just gotten away from me and I have a terrible cold, so I haven’t had a chance to write a full post on my little project yet.

But, in the meantime here are a few more clues to keep you going. All will be revealed soon! I promise!

The First Day of Advent

Where has the year gone? I cannot believe that as I woke up this morning, we entered into one of my most favorite times of the year; the season of Advent. The 24 day build-up to Christmas! It is time to get out my Christmas Pixie, Eglantine. Alas, we are going to be having some work done at the cottage and I won’t be able to decorate as normal.

I have looked and looked at old-fashioned paper and chocolate Advent calendars, but non were beautifully decorated and were not anything I wanted in my house for the next 24 days.  Since most things will have to be packed up for the moment, I wanted something small, maybe even transportable.

In looking at “One Pretty Thing”, I happened upon this:

What a fabulous idea I think this is! This is the perfect Advent calendar for grown-ups, or to mail to a college student or a friend. What a cute idea!

Read the whole post here. Happy First day of Advent!

(All images copyright My Little Mochi)

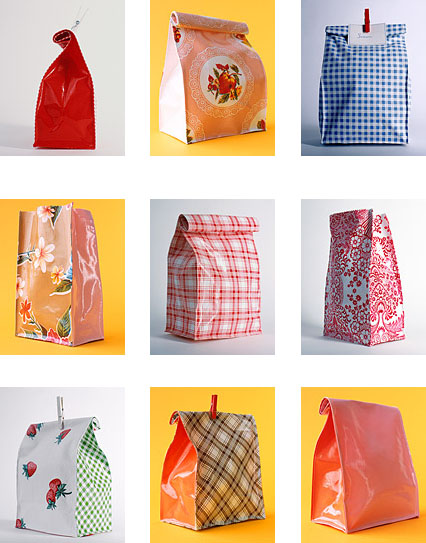
Oilcloth Lunch Bags

I love oilcloth. I love the feel of it. Especially the really nice oilcloth, that is like waxed fabric, I used to work in an interior design store and we had the most scrumptious Swedish oilcloth that had that lovely “waxed fabric” feel.

I adore the vintage oilcloth that is available now, reflecting the quaintness of 1940’s/50’s kitchens. I can just see June Cleaver now with her adorable cherry and polka dot oilcloth or her summer fruits oilcloth with its vibrant blue background laid out on her kitchen table, can’t you?

In honour of going “back-to-school” and to pay homage to oilcloth I am doing a feature today on “Oilcloth Lunch Bags” I found on the Martha Stewart site. So, gather your materials from my class “handout” and get ready to just have fun:

You will need:

Oilcloth (pattern of your choice)
Scissors
Sewing Machine
Thread
Velcro or a clothespin

Lunch Bag How-To
The same oilcloth that covers your kitchen table can transport your children’s lunches — or your own — in leak-free style. These reusable bags will cut back on waste since they can simply be washed with a damp sponge (oilcloth is not washing-machine safe). Use a single print for the whole bag, or cut out complementary patterns or solid colors for side panels. You can attach small Velcro tabs to hold the bags closed, or clip the tops with colorful wooden clothespins.

Cut main piece 29 1/2 by 8 inches and two side panels, each 12 1/4 by 5 inches.
1. Fold long panel, inside out, into U shape with 5-inch bottom.

2. Make 1/4-inch cut at bottom corners of side and middle pieces so bag folds smoothly. Sew-in side panels, leaving 1/4-inch seam allowance.

3. Turn right side out and top-stitch all around, 1/8 inch from edge.

The most important thing to remember while doing this is to use your imagination and just have fun!

I have my eye on some Cath Kidston oilcloth in my beloved “Provence Rose” pattern and as soon as I can get my hands on it, I plan to make my own lunch bag, perhaps with a vintage button to close it with!

(All images and directions are copyright Martha Stewart, for the original article please click here)

The gorgeous Oilcloth.com store are one of my favourite supplies and they have a whole variety of patterns to choose from!

Shirt & Tie

In lieu of the traditional shirt and tie for Father’s Day, I thought this card was quite cute and could hold tickets to a Summer concert or coupons, good for a day out with Dad.

One more day to go, so if you haven’t gotten something yet, this was just too cute not to share. I am loving the Japanese origami techniques…

Directions:

A shirt and tie are a traditional gift for Dad — a card to match is something new. Use legal-size (8 1/2-by-14-inch) decorative paper.

1. Place paper facedown. Fold in half vertically; unfold. Line up left edge with centerline fold, and crease; repeat with right edge. Unfold, and lay flat.

2. Fold top-left corner in to line up with outermost crease, forming a triangle; repeat on top-right corner. Using index fingers and thumbs, pinch together outside points of each triangle so they meet, and crease.

3. While still pinching triangles, fold down top edge (this will make sleeves).

4. Turn paper upside down, and flip it over. Fold down top edge 3/4 inch.

5. Flip paper over. Fold top left and right corners so tips meet at centerline.

6. Tuck bottom edge under collar, and flatten by creasing. For the tie, cut out an 8-by-1/2-inch strip of decorative paper. Knot paper. Snip close to knot on one side; trim other to a point. Glue to shirt.

(Images and directions copyright Martha Stewart)

Recycled Vintage

I love the idea of re-using things, even if you are using them for something other than their original intended purpose.

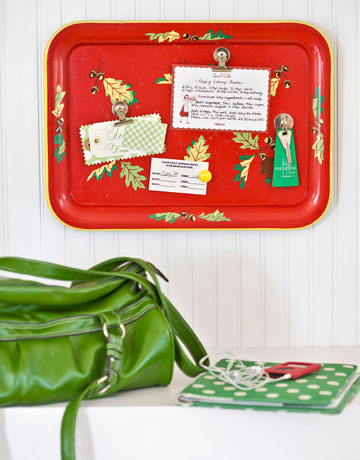
There are a few vintage pieces in our house that are used in a new way, like my Victorian pine cutlery tray; it has become the catch-all “pot” on the table for scissors, tape, pens; an old train box now holds cds and a vintage sweets crate is now the holder of my laundry items…

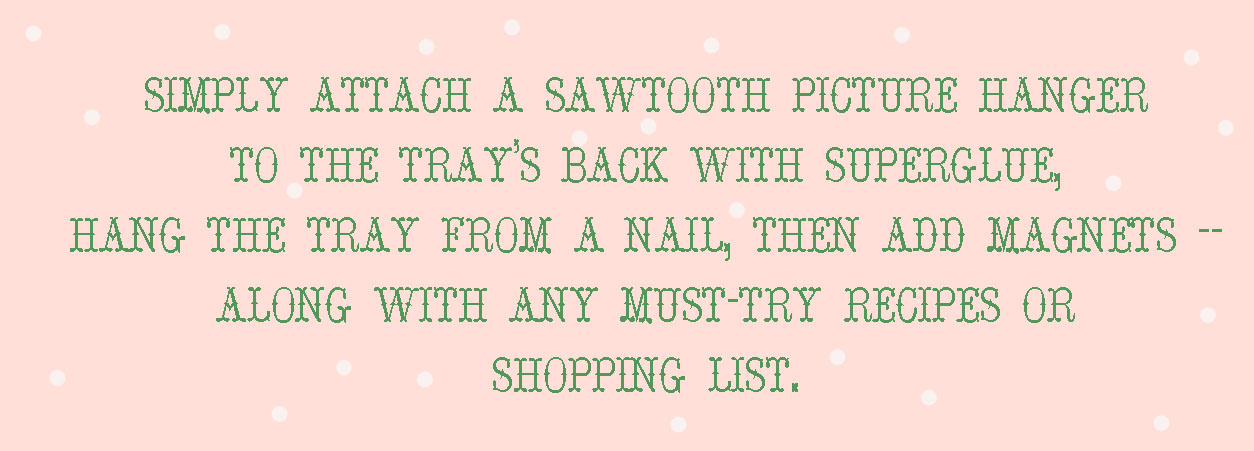
I have had this little project idea on the back-burner for awhile now, I can’t seem to find the right metal tray, but I know the one for me is out there.

In the mean time I thought I would share the Farm Chicks project idea with you that I want to do. Enjoy!

(Image and directions copyright Country Living Magazine – The Farm Chicks)